Manual Setup Guide for a Modelyo on GCP
Modelyo
Manual Setup Guide for a Modelyo on GCP
This guide provides step-by-step instructions to help you successfully deploy and configure Modelyo as a Confidential VM (CVM) in your Google Cloud environment. Let's get started!
Modelyo is deployed as a CVM created from a Machine Image available in the Google Marketplace.
Step 1: Prerequisites
Before you begin, ensure you have the following:
- An active account in Google Cloud
- An active Google project connected to a billing account
- Modelyo installed as a Confidential VM (CVM) from Google Marketplace
- Ingress communication to the VM done over ports 2004 and 4000. Verify that those ports are open.
- A terminal or command prompt - users interacting with Modelyo Services throughout Modelyo CLI tool which is provided as part of the setup.
Step 2: Modelyo Deployment on Customer's Google Project
- Go to Google Marketplace from the console to get Modelyo Solution.

- Create Modelyo VM from the Console or with gcloud
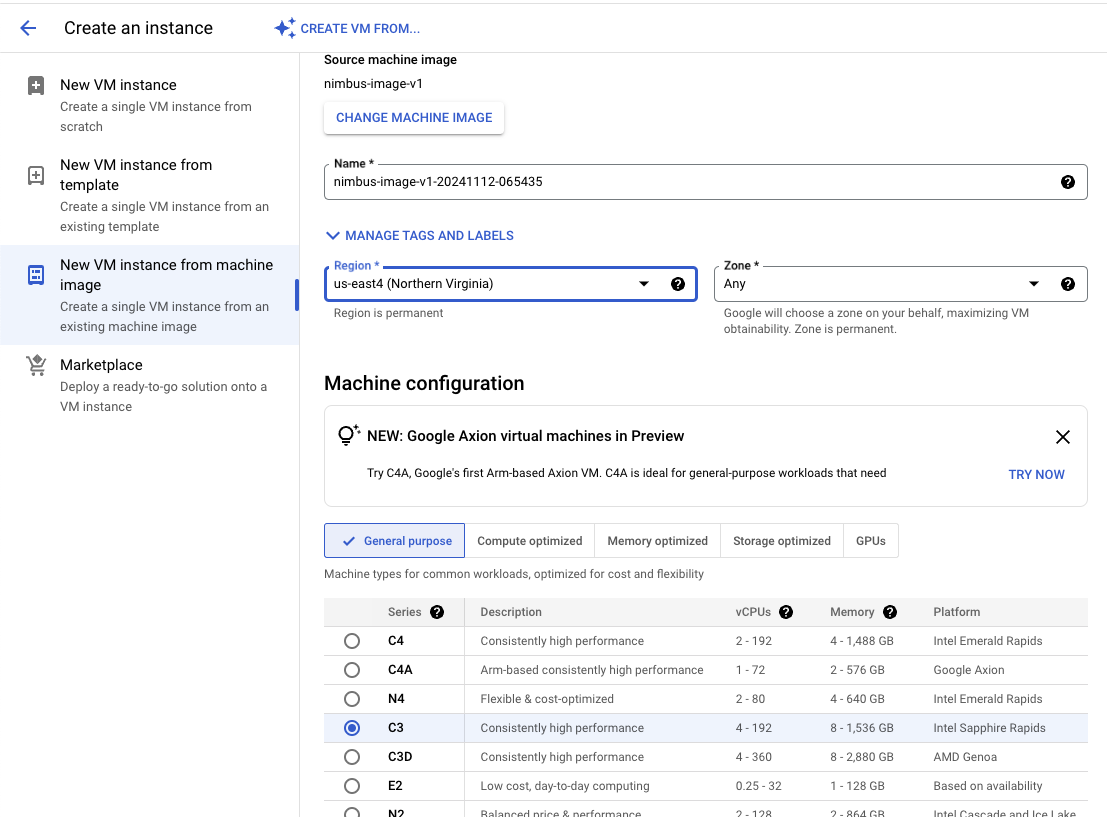
- Console - Follow the VM creation Wizard

- From the terminal with gcloud CLI
$ gcloud compute instances create my-modelyo-cvm \ --image=nimbus-image-v1 \ --image-project=\ --zone=
- Console - Follow the VM creation Wizard
- Verify that the VM is started in the Console (VM Instances) or with gcloud
- Via Console
- gcloud CLI command
gcloud compute instances describe my-modelyo-vm --zone us-east1-b --format='get(status)'- RUNNING
- Make a note of the IP address of the newly created VM, as it will be required during the Modelyo CLI setup process.
Step 3: Modelyo Services Setup
The setup of Modelyo Services is done with Modelyo CLI.
- Install Modelyo CLI on the user touchpoint - laptop, VM, other
- Run
modelyo attestcommand - Modelyo Attest checks Modelyo Confidential VM integrity, following executing taking ownership of the CVM and generating certificates that are used by Modelyo services and CLI for Secure TLS based communications, there is a set of dedicated public/private certificates per Modelyo Service (CA, CVM)
- Certificate Table with Explanation
Certificate Service Description ca.pem Modelyo CA CA’s, Root Authority public key used by CLI to verify CVMs authenticity and integrity, including CVM (tdx) public key ca_client.key Modelyo CLI Private CLI key used for authentication against the CA APIs ca_client.pem Modelyo CLI Public CLI key used for authentication against the CA APIs tdx_ca.pem Modelyo CVM Management Service Modelyo’s CVM Manager APIs public certificate, used by the CLI to verify Modelyo CVM Server APIs tdx_client.pem Modelyo CLI Public key that used by the CLI to communicate over TLS with Modelyo CVM Management Services tdx_client.key Modelyo CLI Private key that used by the CLI to communicate over TLS with Modelyo CVM Management Services - Prepare your data to be uploaded to the storage of your choice
- Modelyo CLI provides cypher local capabilities for file encryption/decryption - customer can encrypt their files with a AES bsed symmetric encryption private key generated during the Modelyo Attest stage
- Customers can upload their encrypted files to the storage (Buckets, SFTP, other)
- Docker preparation - users upload your workloads in docker containers to Modelyo CVM
- Use the docker CLI or Modelyo’s to build
- Use Modelyo CLI to load the image to the Modelyo CVM
- Use Modelyo run the image remotely on the Modelyo CVM
By the end of this guide, you will have a fully operational Modelyo deployment, ready to deliver secure GPU-based processing in your GCP project.
Appendix: Integration between Customer Docker and Modelyo’s Cipher daemon service
Modelyo cipher daemon is running on the CVM and responsible for the cipher operations like encryption/decryption. Customer logic in the docker integrates with the cipher daemon based on directories.
The directories allocation (docker -v) is done implicitly as part of Modelyo’s APIs.
Customer should just interact with the directories under the local docker directories structure as following:
/modelyo
enc_in
enc_out
dec_in
dec_out| Directory | Explanation |
|---|---|
| enc_in | For encryption write the files to this directory |
| enc_out | Contains the encrypted files |
| dec_in | For decryption write files to this directory |
| dec_out | Contains the decrypted files |